Launch your collection
Your collection is finalized, you've downloaded all your tokens and metadata...so now what? If you're ready to launch, we recommend deploying a smart contract and dropping your tokens with thirdweb. You have two options for launching your collection with thirdweb: using our custom integration, or doing it yourself manually.
Launch with our thirdweb integration
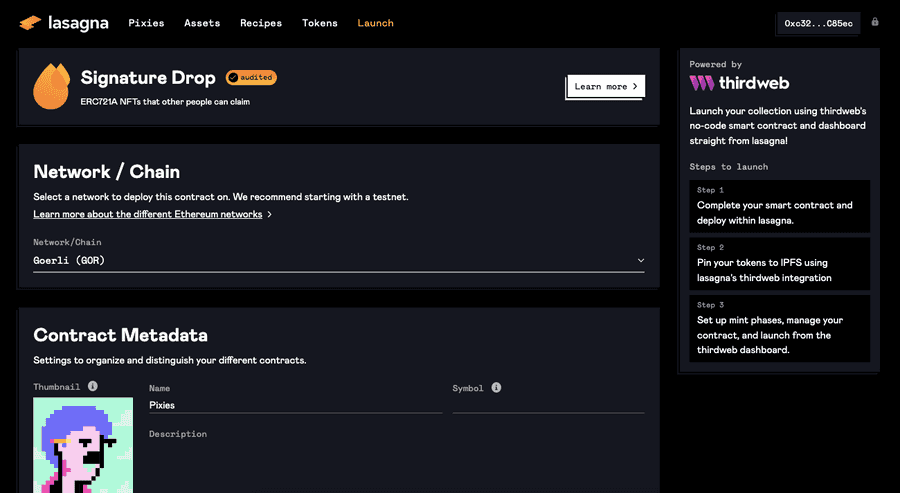
Lasagna makes it easy to deploy a smart contract with our thirdweb integration all within our application. Simply go to the launch page, fill out your smart contract details, then click the "Deploy contract" button. We also give you the option to upload a custom image, or use one of your pre-built tokens as a thumbnail. You will also need to sign off on the deployment with your wallet.
This step assumes that you have already pinned your tokens to IPFS. If you have not pinned them already, you'll be prompted to do so.
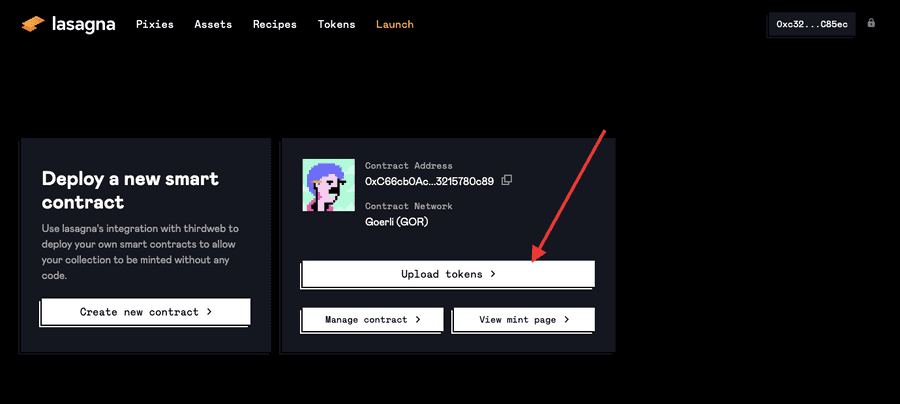
Once your contract is deployed, you will need to upload your tokens so that your contract can reference them. This can be done quite literally with the push of a button - just click the "Upload tokens" button.
Once your tokens are uploaded, you should be all set to finish up launching your collection with thirdweb! Just click the "Manage contract" button to view your contract in the thirdweb dashboard.
Launch manually with thirdweb
If you want to handle everything involving your smart contract and launch on your own with thirdweb, follow these steps:
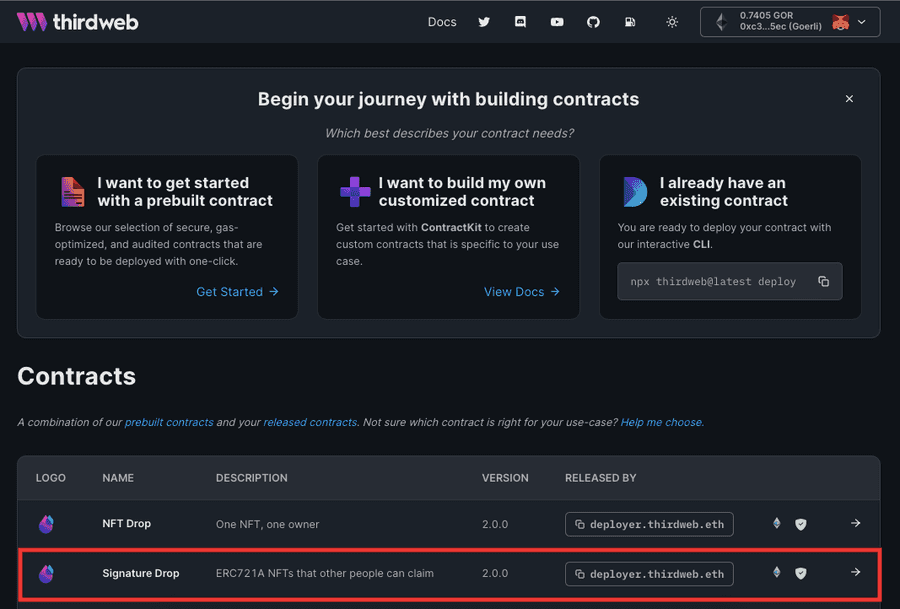
- Go to https://thirdweb.com/dashboard and connect your wallet. Once you've connected your wallet, you will see a list of pre-built smart contracts that you can use to launch your collection. For this guide, we will be using the Signature Drop contract, so go ahead and select that one.
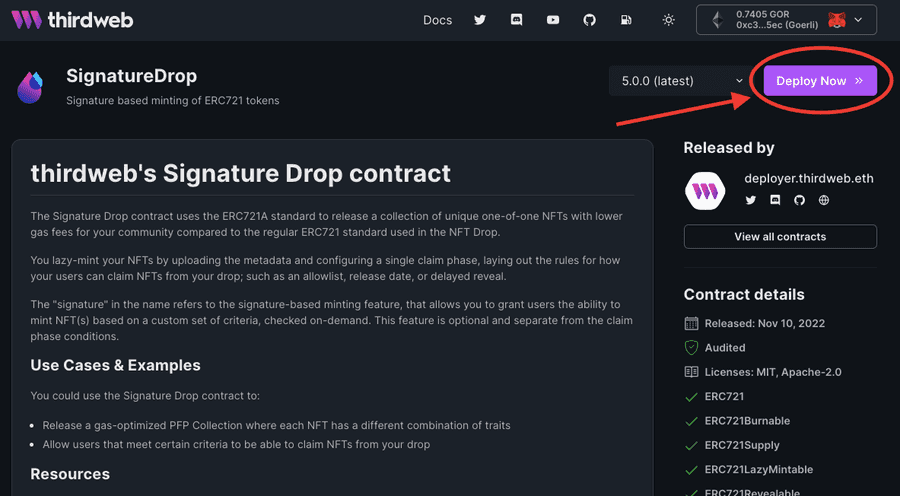
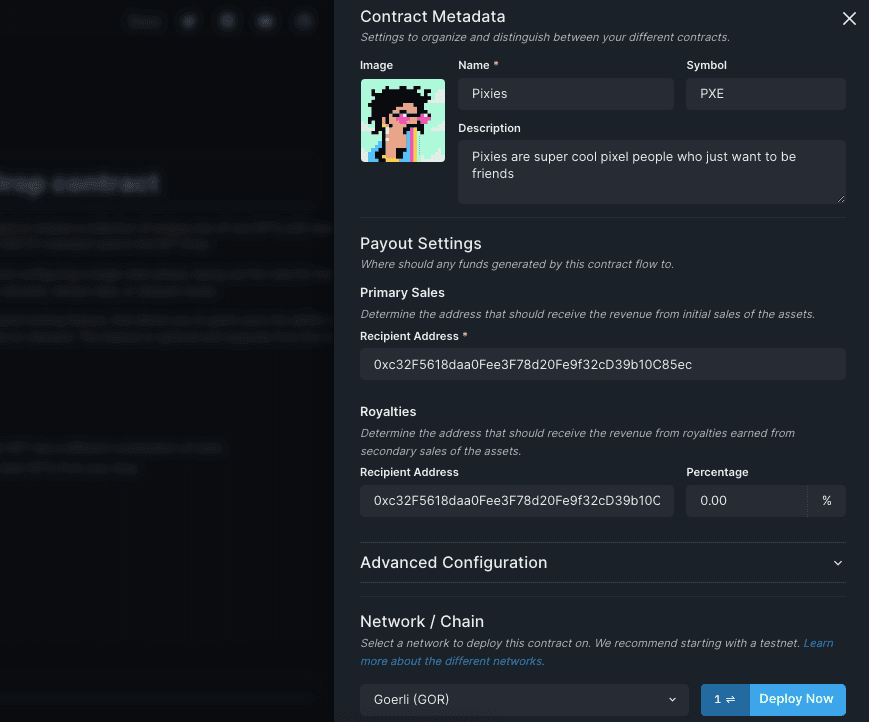
- From the Signature Drop contract page, click the "Deploy Now" button in the top right.
- In the drawer that opens up at the right of your screen, populate the contract metadata fields to suit your collection. Select the primary sales recipient, royalty fees, and network that you want to use to deploy your collection. Note that you will need to have sufficient funds to pay the gas fees for deploying the contract. When you're all set, click the blue "Deploy Now" button at the bottom right. It may take a few seconds to deploy.
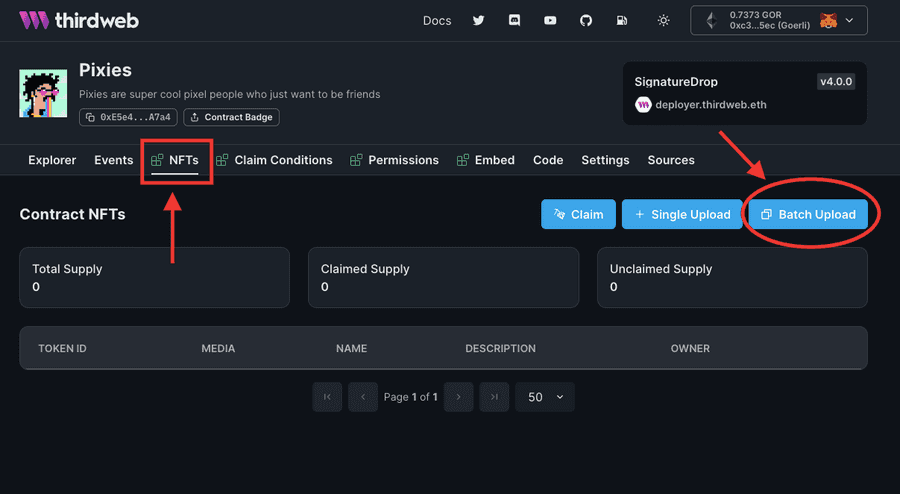
- Let's get ready to upload our NFT assets and metadata. Click the "NFTs" tab, then click the "Batch Upload" button at the top right.
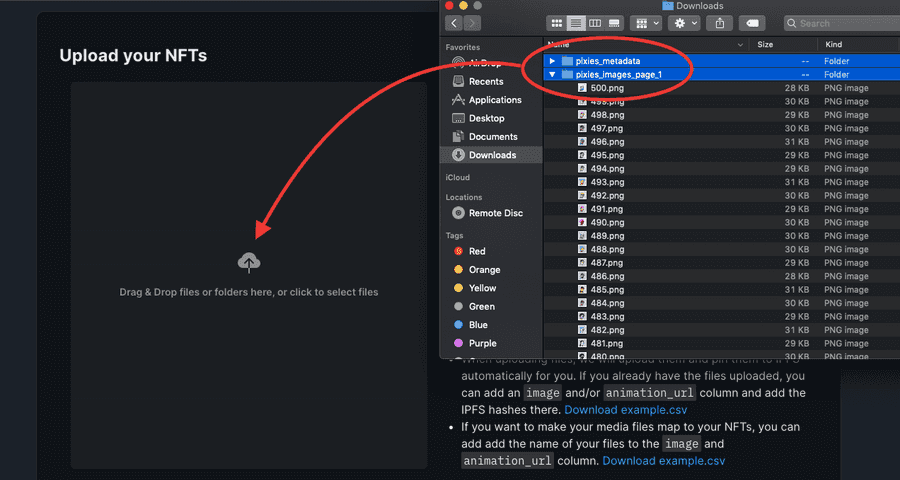
- Remember those images and JSON metadata files you downloaded from lasagna earlier? It's time to upload them. Thirdweb makes it super easy to just drag and drop all your files at once, then it will automatically associate your metadata files with your images.
Thirdweb will automatically handle pinning your images to IPFS for you, so don't worry if you don't have them pinned.
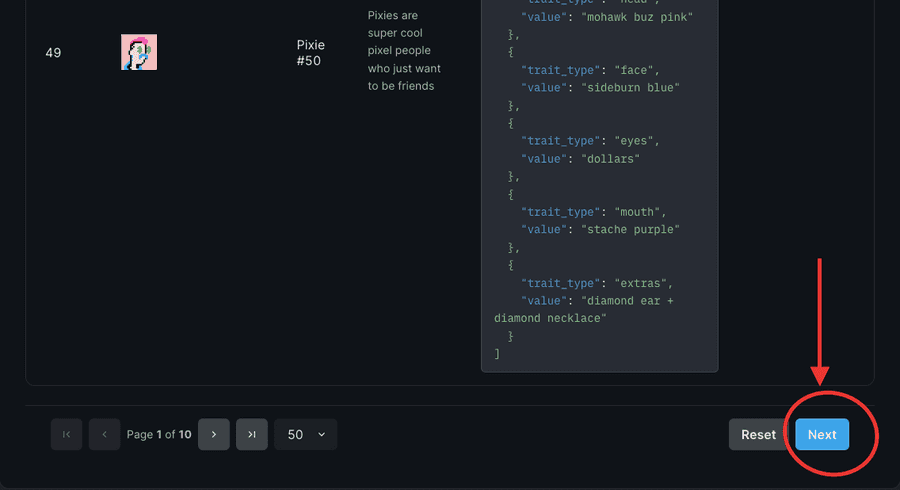
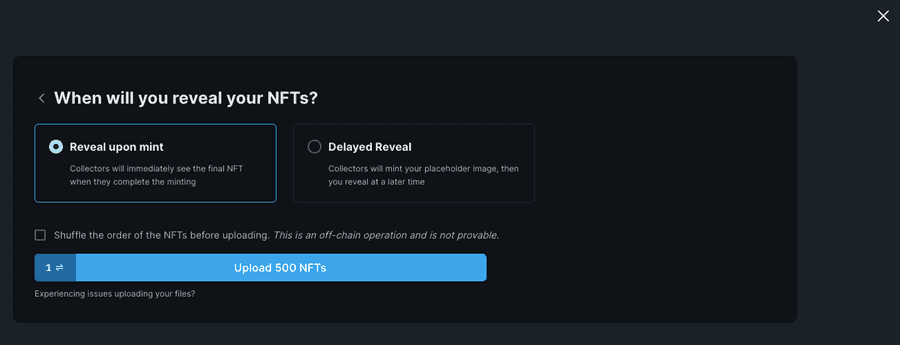
- Once you've dragged and dropped your assets, scroll to the bottom of the page and click the "Next" button. You'll then be able to decide if you want to reveal your NFTs on mint, or do a delayed reveal. Once you're ready, click the big blue button to upload your NFTs. Again, you'll need to have sufficient funds to pay the gas fees.
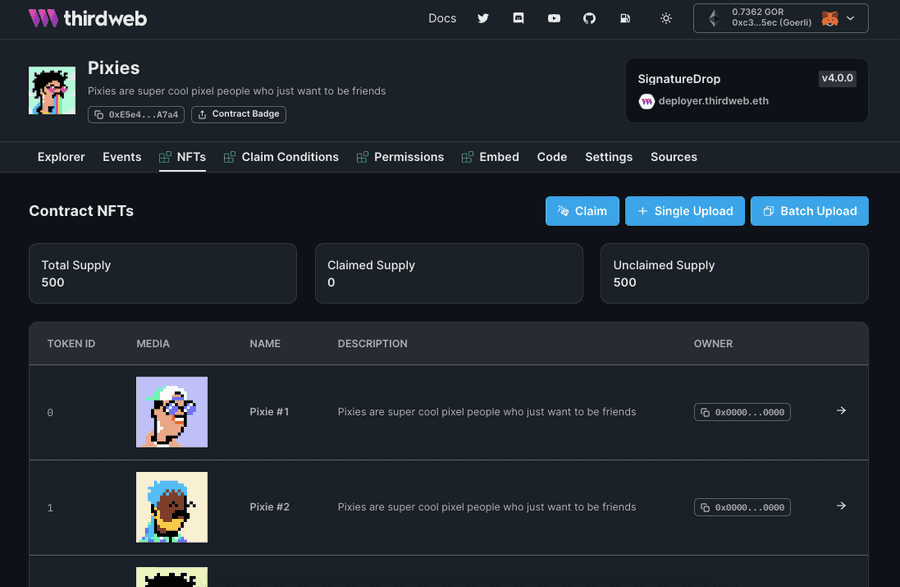
- That should do it! You will now be able to see your NFTs listed in the thirdweb dashboard page.
Next steps
Now that your contract is deployed and your tokens are finalized, the next steps are up to you. You can update claim conditions, grant permissions and more all through the thirdweb dashboard.
Congrats on making it this far, and good luck with launching your collection!
